Ever bitten into a slice of Key lime pie and felt like you were just eating green-tinted sugar? It’s a tragedy. Honestly, most "classic" recipes are either too sweet or weirdly gelatinous. But then there is the Martha Stewart Key Lime Pie.
It’s the gold standard for a reason.
If you’ve spent any time in a kitchen, you know Martha doesn’t do "good enough." She does "perfect." Her take on this Florida classic is basically a masterclass in balancing high-acid citrus with the thick, velvety richness of sweetened condensed milk. It isn't just a recipe; it's kind of a ritual for anyone who takes summer desserts seriously.
The Anatomy of the Perfect Crust
Most people mess up the crust before they even touch a lime. They buy those pre-made graham cracker shells from the grocery store. Don't do that. Martha’s version demands a homemade graham cracker crust that actually tastes like something.
You need 1 ½ cups of graham cracker crumbs. That’s roughly 10 full crackers if you’re crushing them yourself. Mix that with 6 tablespoons of melted unsalted butter and 3 to 5 tablespoons of sugar. Martha’s secret? A pinch of salt. It makes the butter pop.
You press this mixture into a 9-inch pie plate. You want it even. Not too thick on the bottom, not too thin on the sides. Then you bake it at 375°F for about 12 minutes. This step is non-negotiable. If you don't pre-bake the crust, the filling will turn the whole thing into a soggy, sandy mess. Let it cool completely on a wire rack before you even think about the filling.
Why the Filling is a Science Experiment
Key lime pie is a bit of a chemical miracle. Back in the day, sailors and ship cooks in the Florida Keys didn't have fresh milk or ovens. They used canned sweetened condensed milk because it didn't spoil. The high acid content in Key lime juice actually "cooks" or thickens the egg yolks and milk through a process called denaturation.
Martha’s filling is deceptively simple:
- One 14-ounce can of sweetened condensed milk
- 4 large egg yolks
- ½ cup of freshly squeezed Key lime juice
- 1 tablespoon of Key lime zest
Here is where people get it wrong. They skip the zest. Do not skip the zest. That tablespoon of grated rind is where the floral, aromatic punch lives. Without it, you’re just getting the sour, not the soul of the lime.
You whisk the milk and yolks together first. Then you slowly pour in the juice and zest. The mixture starts to thicken almost instantly. Martha recommends baking the pie at 325°F for about 15 to 17 minutes. You’re looking for the "quiver." The edges should be set, but the center should still jiggle like Jell-O when you nudge the pan.
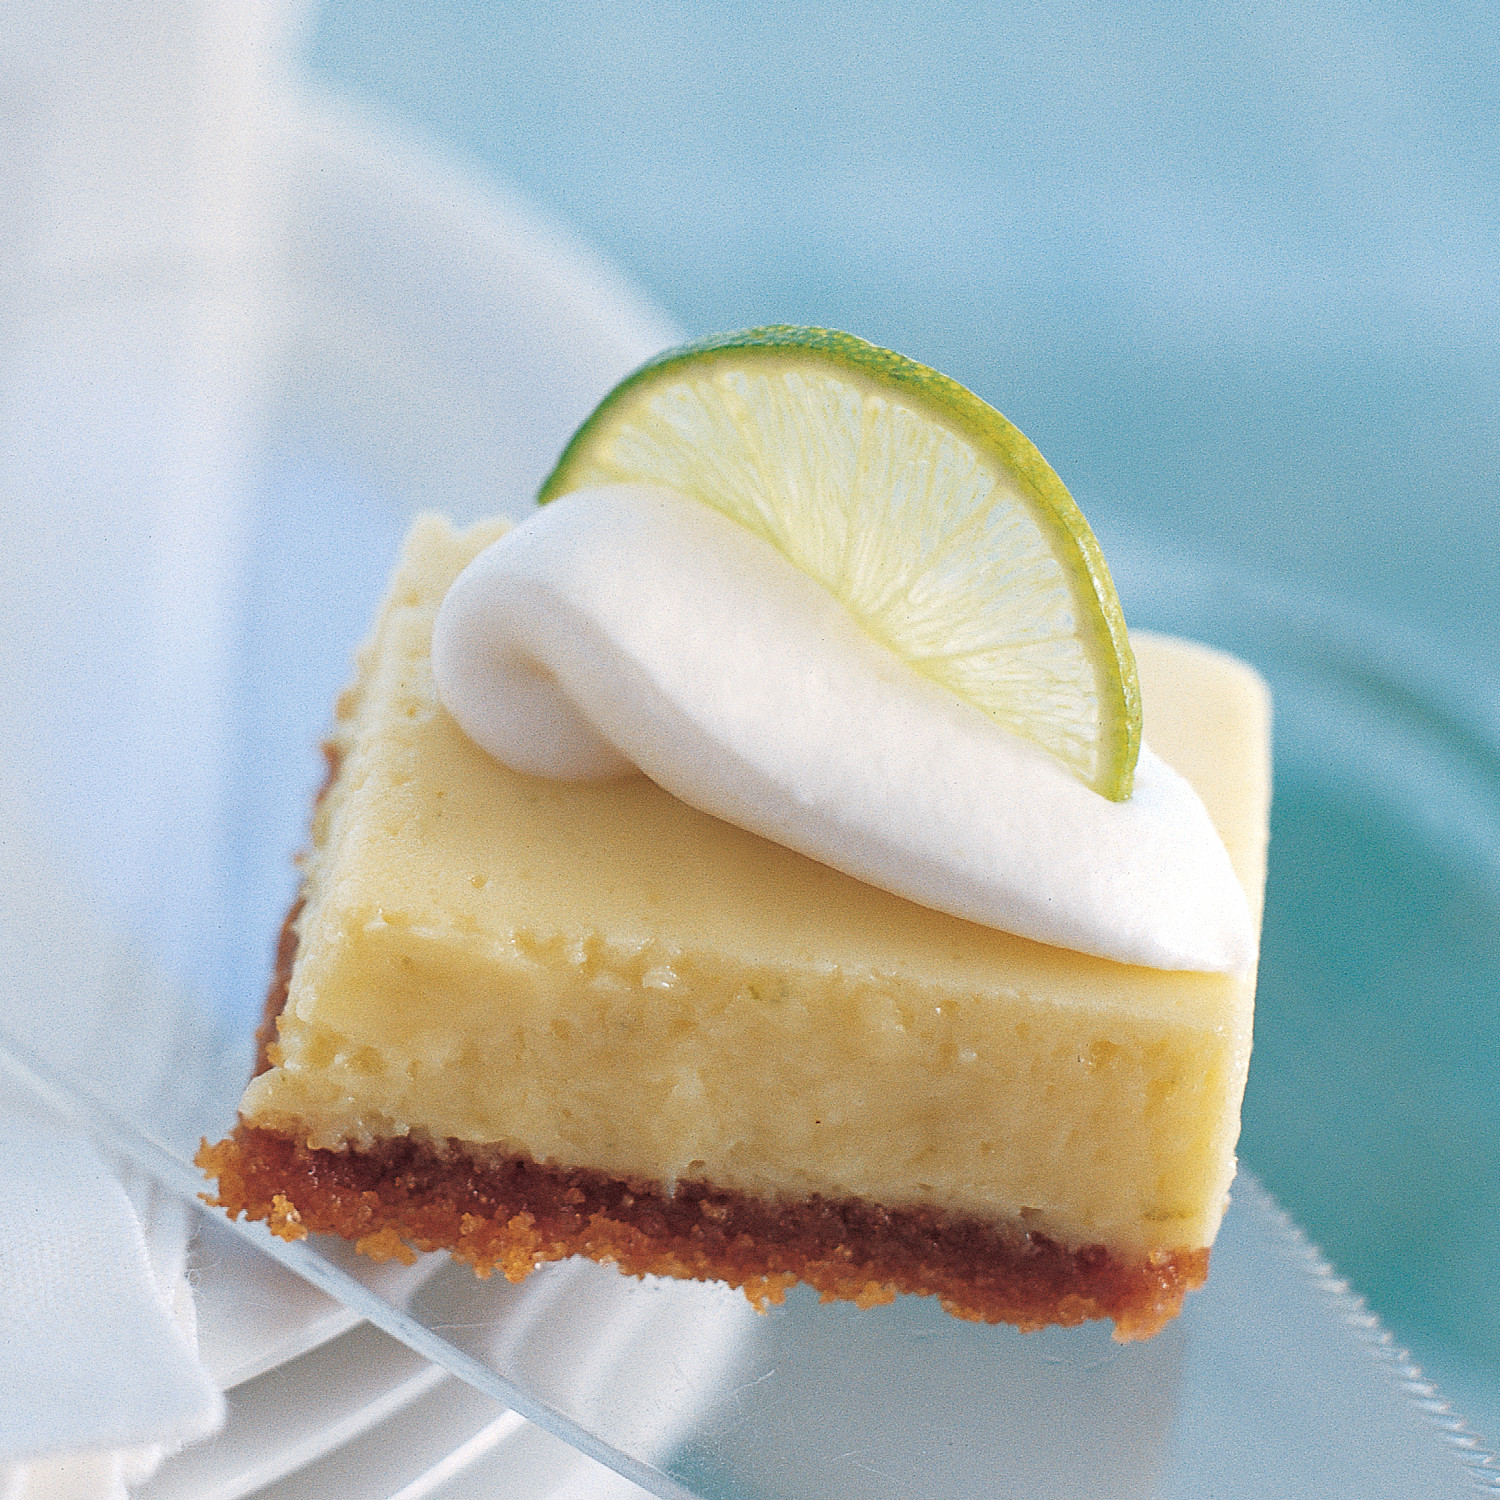
The Great Topping Debate: Whipped Cream vs. Meringue
If you want to start a fight in Key West, ask if the pie should have meringue or whipped cream. Historically, meringue was used because it utilized the egg whites left over from the filling. Martha, being Martha, gives you options.
In her more traditional recipes, she leans toward a heavy whipped cream. We’re talking 1 ½ cups of heavy cream whipped with 2 tablespoons of sugar until soft peaks form. It’s light. It cuts through the density of the custard.
But sometimes she goes the "showstopper" route with a toasted meringue. If you’re feeling fancy, you beat those leftover egg whites with sugar and salt until they’re glossy and stiff. You spread it over the pie, making sure it touches the crust (to prevent shrinking), and then you hit it with a kitchen torch.
Key Limes vs. Persian Limes: Does It Matter?
Let’s be real for a second. Finding actual Key limes—the tiny, golf-ball-sized ones with thin skins and a million seeds—is a pain. It takes about 20 of those little guys to get a half-cup of juice.
Martha prefers fresh Key limes because they have a higher acidity and a more floral scent than the standard Persian limes you find in every supermarket. But honestly? If you can't find them, don't panic. You can use regular limes. Just don’t use the bottled "lime juice" in the green plastic fruit. That stuff tastes like floor cleaner. If you must use bottled, look for Nellie & Joe’s Famous Key West Lime Juice. It’s the only one that comes close to the real thing.
Common Pitfalls to Avoid
- The Runny Center: This usually happens because the pie wasn't chilled long enough. You need to let it cool on the counter, then shove it in the fridge for at least 6 hours. Overnight is better.
- The "Green" Mistake: Real Key lime pie is yellow. If you see a green pie, it’s full of food coloring. The yolks and the lime juice create a pale, creamy yellow hue. Embrace it.
- Over-baking: If you bake it until it’s solid, the texture becomes rubbery. Remember the jiggle.
Making It Your Own
Once you’ve mastered the basic Martha Stewart Key Lime Pie, you can sort of riff on it. Some people swap the graham crackers for Biscoff cookies or ginger snaps. The ginger adds a spicy kick that plays really well with the lime.
Others, like Ina Garten, actually freeze their pies. Martha’s version is meant to be served chilled, but a semi-frozen slice on a 90-degree day? It’s life-changing.
What to do next
If you're ready to tackle this, start by sourcing your limes. If you find Key limes, buy a bag and clear your afternoon—you’ve got a lot of squeezing to do.
- Check your pie plate: Ensure it’s a standard 9-inch plate; deep-dish versions might leave your filling looking a bit shallow.
- Temperature check: Make sure your egg yolks are at room temperature before whisking; they’ll emulsify much better with the condensed milk.
- Zest first, juice second: It is much easier to zest a whole lime than a squeezed one. Trust me on this.
Once the pie is in the fridge, leave it alone. The hardest part of this recipe isn't the zesting—it’s the waiting.